Install Helm 3 on Kubernetes Cluster & Use it to Run Kubernetes Connector
Introduction
This Blog Post consists of three parts and demonstrates, how you can install Helm 3 on Kubernetes Cluster and use it to run the Kubernetes Connector:
- Part 1: Running Infrastructure Kubernetes Connectors as CronJobs
- Part 2: Infrastructure Kubernetes Connector – Add an Application
- Part 3: Run a Kubernetes Connector with a Helm Hook
We started this three-part series with the setup of the Infrastructure Kubernetes Connectors. In the second article, we showed, how the API Keys for an Application can be managed by ConfigSeeder and the Infrastructure Kubernetes Providers.
In this last part, we show how you can run a Kubernetes Connector as a pre-* Helm Hook to provide ConfigMaps and Secrets to an Application.
If you haven’t already downloaded the Pre-* Hook variant of our Helm Charts, please get it from our download site.
Part 3: Install Helm 3 & Use Kubernetes Connector with a Helm Hook
Preconditions
This Blog Article assumes that you already worked through the first two articles. As a result of working through these articles, the following Objects should already exist in your cluster:
- Namespace
application1-test - Namespace
application-prod - Secret
application1-test/kubernetes-connector-apikey - Secret
application1-prod/kubernetes-connector-apikey
Get the alpine-example Helm Chart from our scripts project.
Prepare ConfigSeeder
There are multiple ways to configure a Deployment in Kubernetes. For instance, you can inject environment variables or whole files into a container. This article shows how you can create different kinds of ConfigMaps and Secrets with ConfigSeeder and the Kubernetes Connector and how the data injected into the container will look.
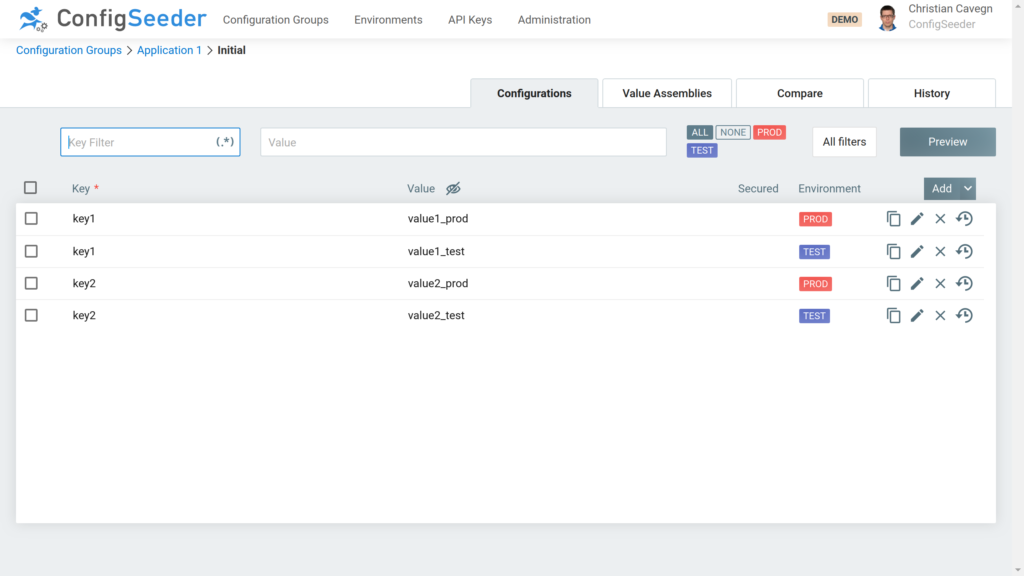
First of all, add the following values to the Configuration Group Application 1:
ConfigMap containing key-value-pairs
With the Assembly Type ConfigMap: Key/Value you can create a ConfigMap containing Key/Value pairs. These key-value-pairs are either stored inside the Assembly or in a referenced configuration group and can be injected as environment variables into a container.
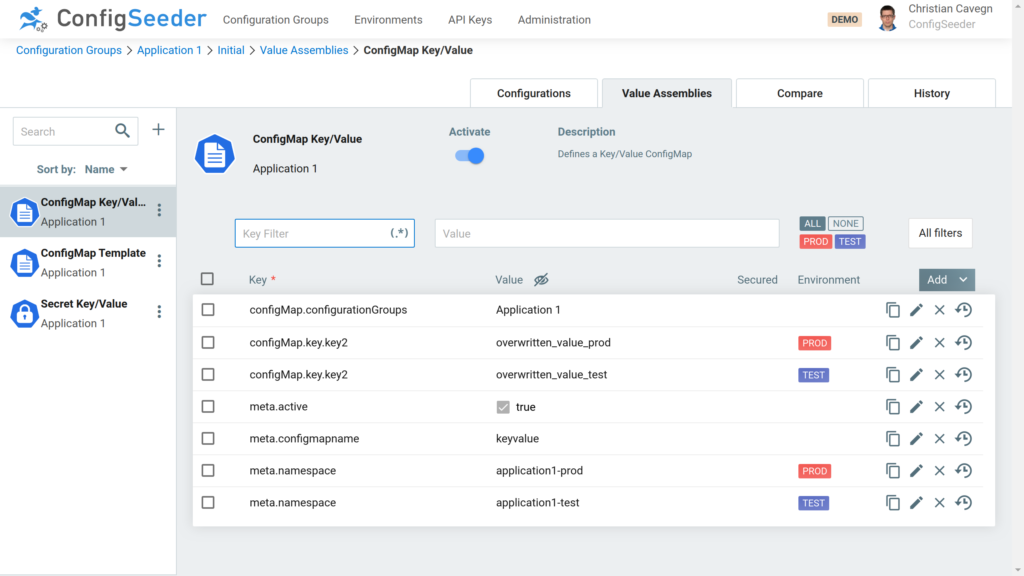
As you can see on the screenshot – when the Kubernetes Connector processes this assembly, it will
- store the ConfigMap for environment TEST the namespace application1-test, for PROD in the namespace application1-prod.
- add the values stored previously in the configuration group Application 1 to the ConfigMap.
- set the value of key2 to overwritten_value_test/prod even if the referenced configuration group defines another value for this key. The reason for that is that values defined in the assembly always overwrite values defined in a referenced configuration group.
ConfigMap containing a file with templating
With the Assembly Type ConfigMap: Template you can create a ConfigMap that contains one or multiple file entries. The content of these files can be static but you also can use templates.
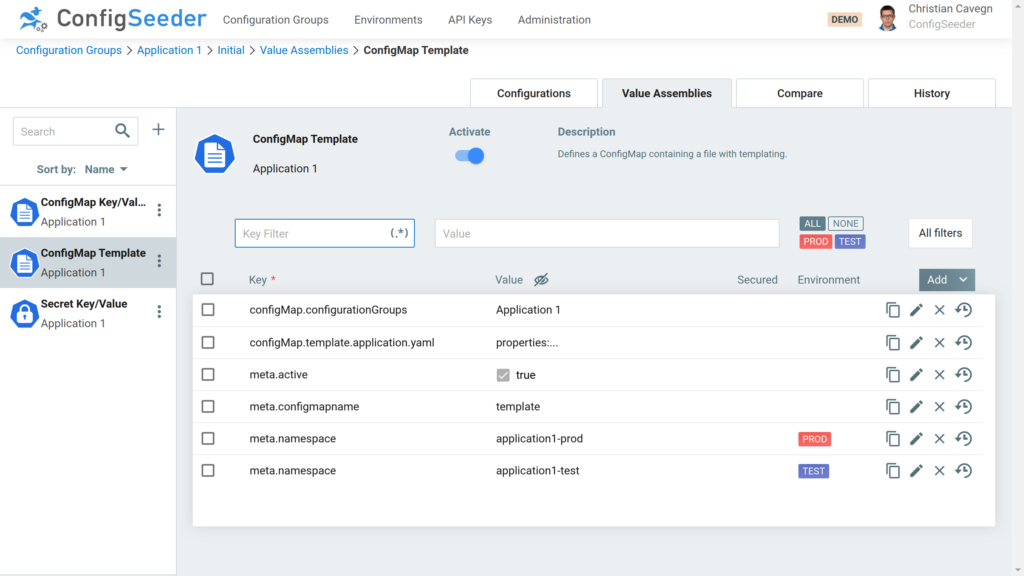
Firstly, define with the key configmap.configurationGroups from which configuration group(s) the stored configuration values should be used for the templating.
Secondly, you can add a new template entry and then enter a new template:
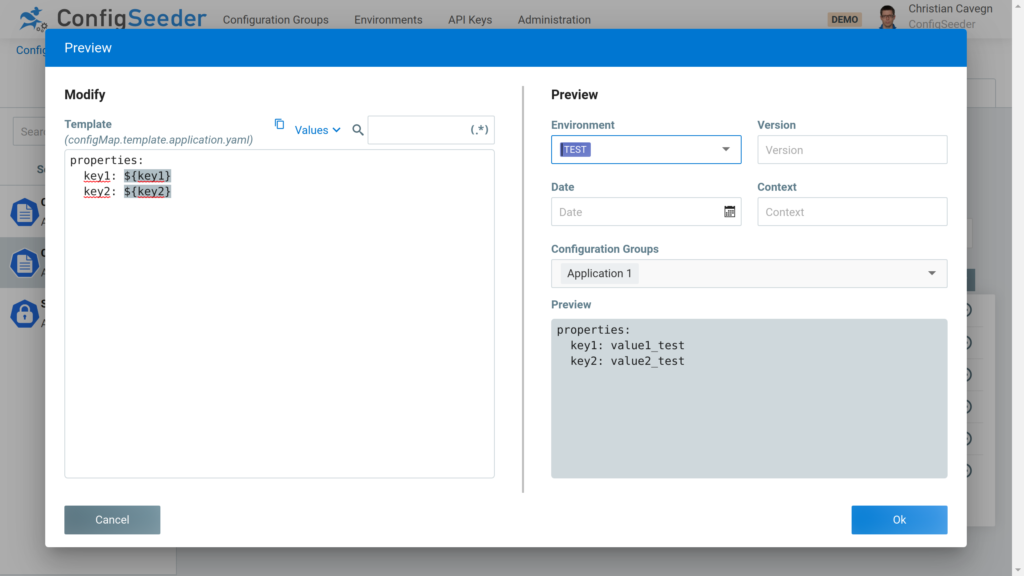
The template itself can be the same for multiple environments (like in this example) or it can be different for TEST and PROD. During the resolving of the keys used in the template (in this example key1 and key2), ConfigSeeder will look up the values with the right environment, and the Kubernetes Connector will create the ConfigMap with the correct data.
Secret with key-value-pairs defined inside Assembly
With the Assembly Type Secret: Key/Value you can crate Secrets containing key-value-pairs.

Like in the Assembly Type ConfigMap: Key/Value, you can combine key-value pairs stored inside the assembly and key-value pairs stored in one or multiple referenced configuration groups.
Install Application
Prepare the value-files (and be sure to replace the serverUrl with the correct value).
Content of file alpine-test.yaml:
configseeder-kubernetes-connector-hook:
  kubernetesConnector:
    configseeder:
      serverUrl: "https://demo.configseeder.com/"
      environmentKey: "TEST"
      configurationGroupKeys: "application1"

  psp:
    create: true

  rbacState:
    create: false

  rbacObjects:
    create: true
Content of file alpine-prod.yaml:
configseeder-kubernetes-connector-hook:
  kubernetesConnector:
    configseeder:
      serverUrl: "https://demo.configseeder.com/"
      environmentKey: "PROD"
      configurationGroupKeys: "application1"

  psp:
    create: true

  rbacState:
    create: false

  rbacObjects:
    create: true
Install the application by executing the following commands:
mkdir alpine-example/charts
cp configseeder-kubernetes-connector-hook-<version>.tar.gz alpine-example/charts/
cd alpine-example/charts && tar -xfz configseeder-kubernetes-connector-hook-<version>.tar.gz && cd ../..

helm upgrade -i -n application1-test -f ansible-test.yaml application1 alpine-example
helm upgrade -i -n application1-prod -f ansible-prod.yaml application1 alpine-example
If you run a kubectl get pods --all-namespaces -w in another terminal, you will see how the Chart is deployed. Firstly, Helm executes the Kubernetes Connector as a Job. Secondly, and only if the Job finishes successfully, Helm deploys the alpine container.
If you look into one of the template files contained in hook-chart, you will see that the Kubernetes Connector Job is defined as a Helm Hook:
...
kind: Job
metadata:
  name: {{ .Values.kubernetesConnector.jobName }}
  annotations:
    # This is what defines this resource as a hook. Without this line, the
    # job is considered part of the release.
    "helm.sh/hook": pre-install,pre-upgrade,pre-rollback
    "helm.sh/hook-weight": "-5"
    "helm.sh/hook-delete-policy": before-hook-creation
...
The result of the Installation should look like this:
kubectl get pods --all-namespaces
NAMESPACE              NAME                                       READY   STATUS      RESTARTS   AGE
application1-prod      alpine-6b4d5979c4-jcg2x                    1/1     Running     0          5s
application1-prod      kubernetes-connector-job-qrm24             0/1     Completed   0          9s
application1-test      alpine-6b4d5979c4-5rwhn                    1/1     Running     0          13s
application1-test      kubernetes-connector-job-rtxcl             0/1     Completed   0          17s
Open a shell to one of the alpine pods to see the injected configuration data:
kubectl exec -it -n application1-test alpine-6b4d5979c4-5rwhn -- sh

/ # env | grep -i key
key=value test                     <- injected from Secret
key1=value1_test                   <- injected from ConfigMap
key2=overwritten_value_test        <- injected from ConfigMap

/ # cat /templates/application.yaml
properties:
  key1: value1_test
  key2: value2_test
You can remove the installation by executing the following commands:
helm uninstall -n application1-test application1
helm uninstall -n application1-prod application1
Conclusion
In this article, we showed, how you can use Helm 3 to run the Kubernetes Connector as a pre-* Hook before installing Helm 3 on Kubernetes Cluster, update, or rollback of an application. If you use the Kubernetes Connector in this way, you can exactly control the time when configuration changes will be applied to an application run in Kubernetes.
Of course, you can also use the Kubernetes Connector without having to install Helm 3 on Kubernetes Cluster. For example, if you deploy your applications with Ansible or a similar automation tool, it might be easier to just execute the Kubernetes Director directly from this automation tool.