Using the Kubernetes Connector with Helm 3 – Part 1
Introduction
When using the Kubernetes Connector in a real-world setup, we recommend the following setup:
- Firstly, set up dedicated Kubernetes Connectors per environment to create and manage all the ConfigSeeder API Keys.
Other ConfigSeeder Components like OS Connectors, Kubernetes Connectors but also any other Application will then use these API Keys to connect to the ConfigSeeder. - Secondly, for every application and environment, another Kubernetes Connector manages the required ConfigMaps and Secrets.
Any application deployed to Kubernetes can use these ConfigMaps and Secrets.
For a more detailed description of this setup, see the article Using the Kubernetes Connector.
This Blog Post consists of three parts and demonstrates, how you can use Helm 3 to run the Kubernetes Connector:
- Part 1: Running Infrastructure Kubernetes Connectors as CronJobs
- Part 2: Infrastructure Kubernetes Connector – Add an Application
- Part 3: Run a Kubernetes Connector with a Helm Hook
Use of Namespaces
In this article, we use the following namespaces:
- The namespace kubernetes-connector-infrastructure will be used by the Kubernetes Connectors providing all the ConfigSeeder API Keys.
- The namespaces app1-test / app1-prod will be used for running the test- and prod-installation of the application app1.
Preconditions
- Firstly, the Kubernetes Connector requires access to the Kubernetes API to manage objects like ConfigMaps and Secrets. Therefore you need access to a Kubernetes Cluster with sufficient privileges. This is necessary because you need to be able to create Namespaces, ServiceAccounts, RBAC Roles & -Mappings. If you don’t have the required access to a Cluster, you can start by using k3s or another one-machine cluster.
- Secondly, you need access to a ConfigSeeder Management instance with the licensed Kubernetes Connector Feature. Otherwise, you won’t be able to create Assemblies for the Kubernetes Connector and the Kubernetes Connector won’t be able to receive Value Assemblies from ConfigSeeder. So if you don’t have such a license, please don’t hesitate to contact us for a trial license. We will be happy to provide you with such a license free of charge.
- In addition, please get our helm charts from our Download site. You probably need both Helm Charts (CronJob and Hook).
Part 1: Setup the Infrastructure Kubernetes Connector as a CronJob
Prepare ConfigSeeder
- In this blog article series, we will work with the two environments TEST and PROD. Therefore, as a first step, create these environments.
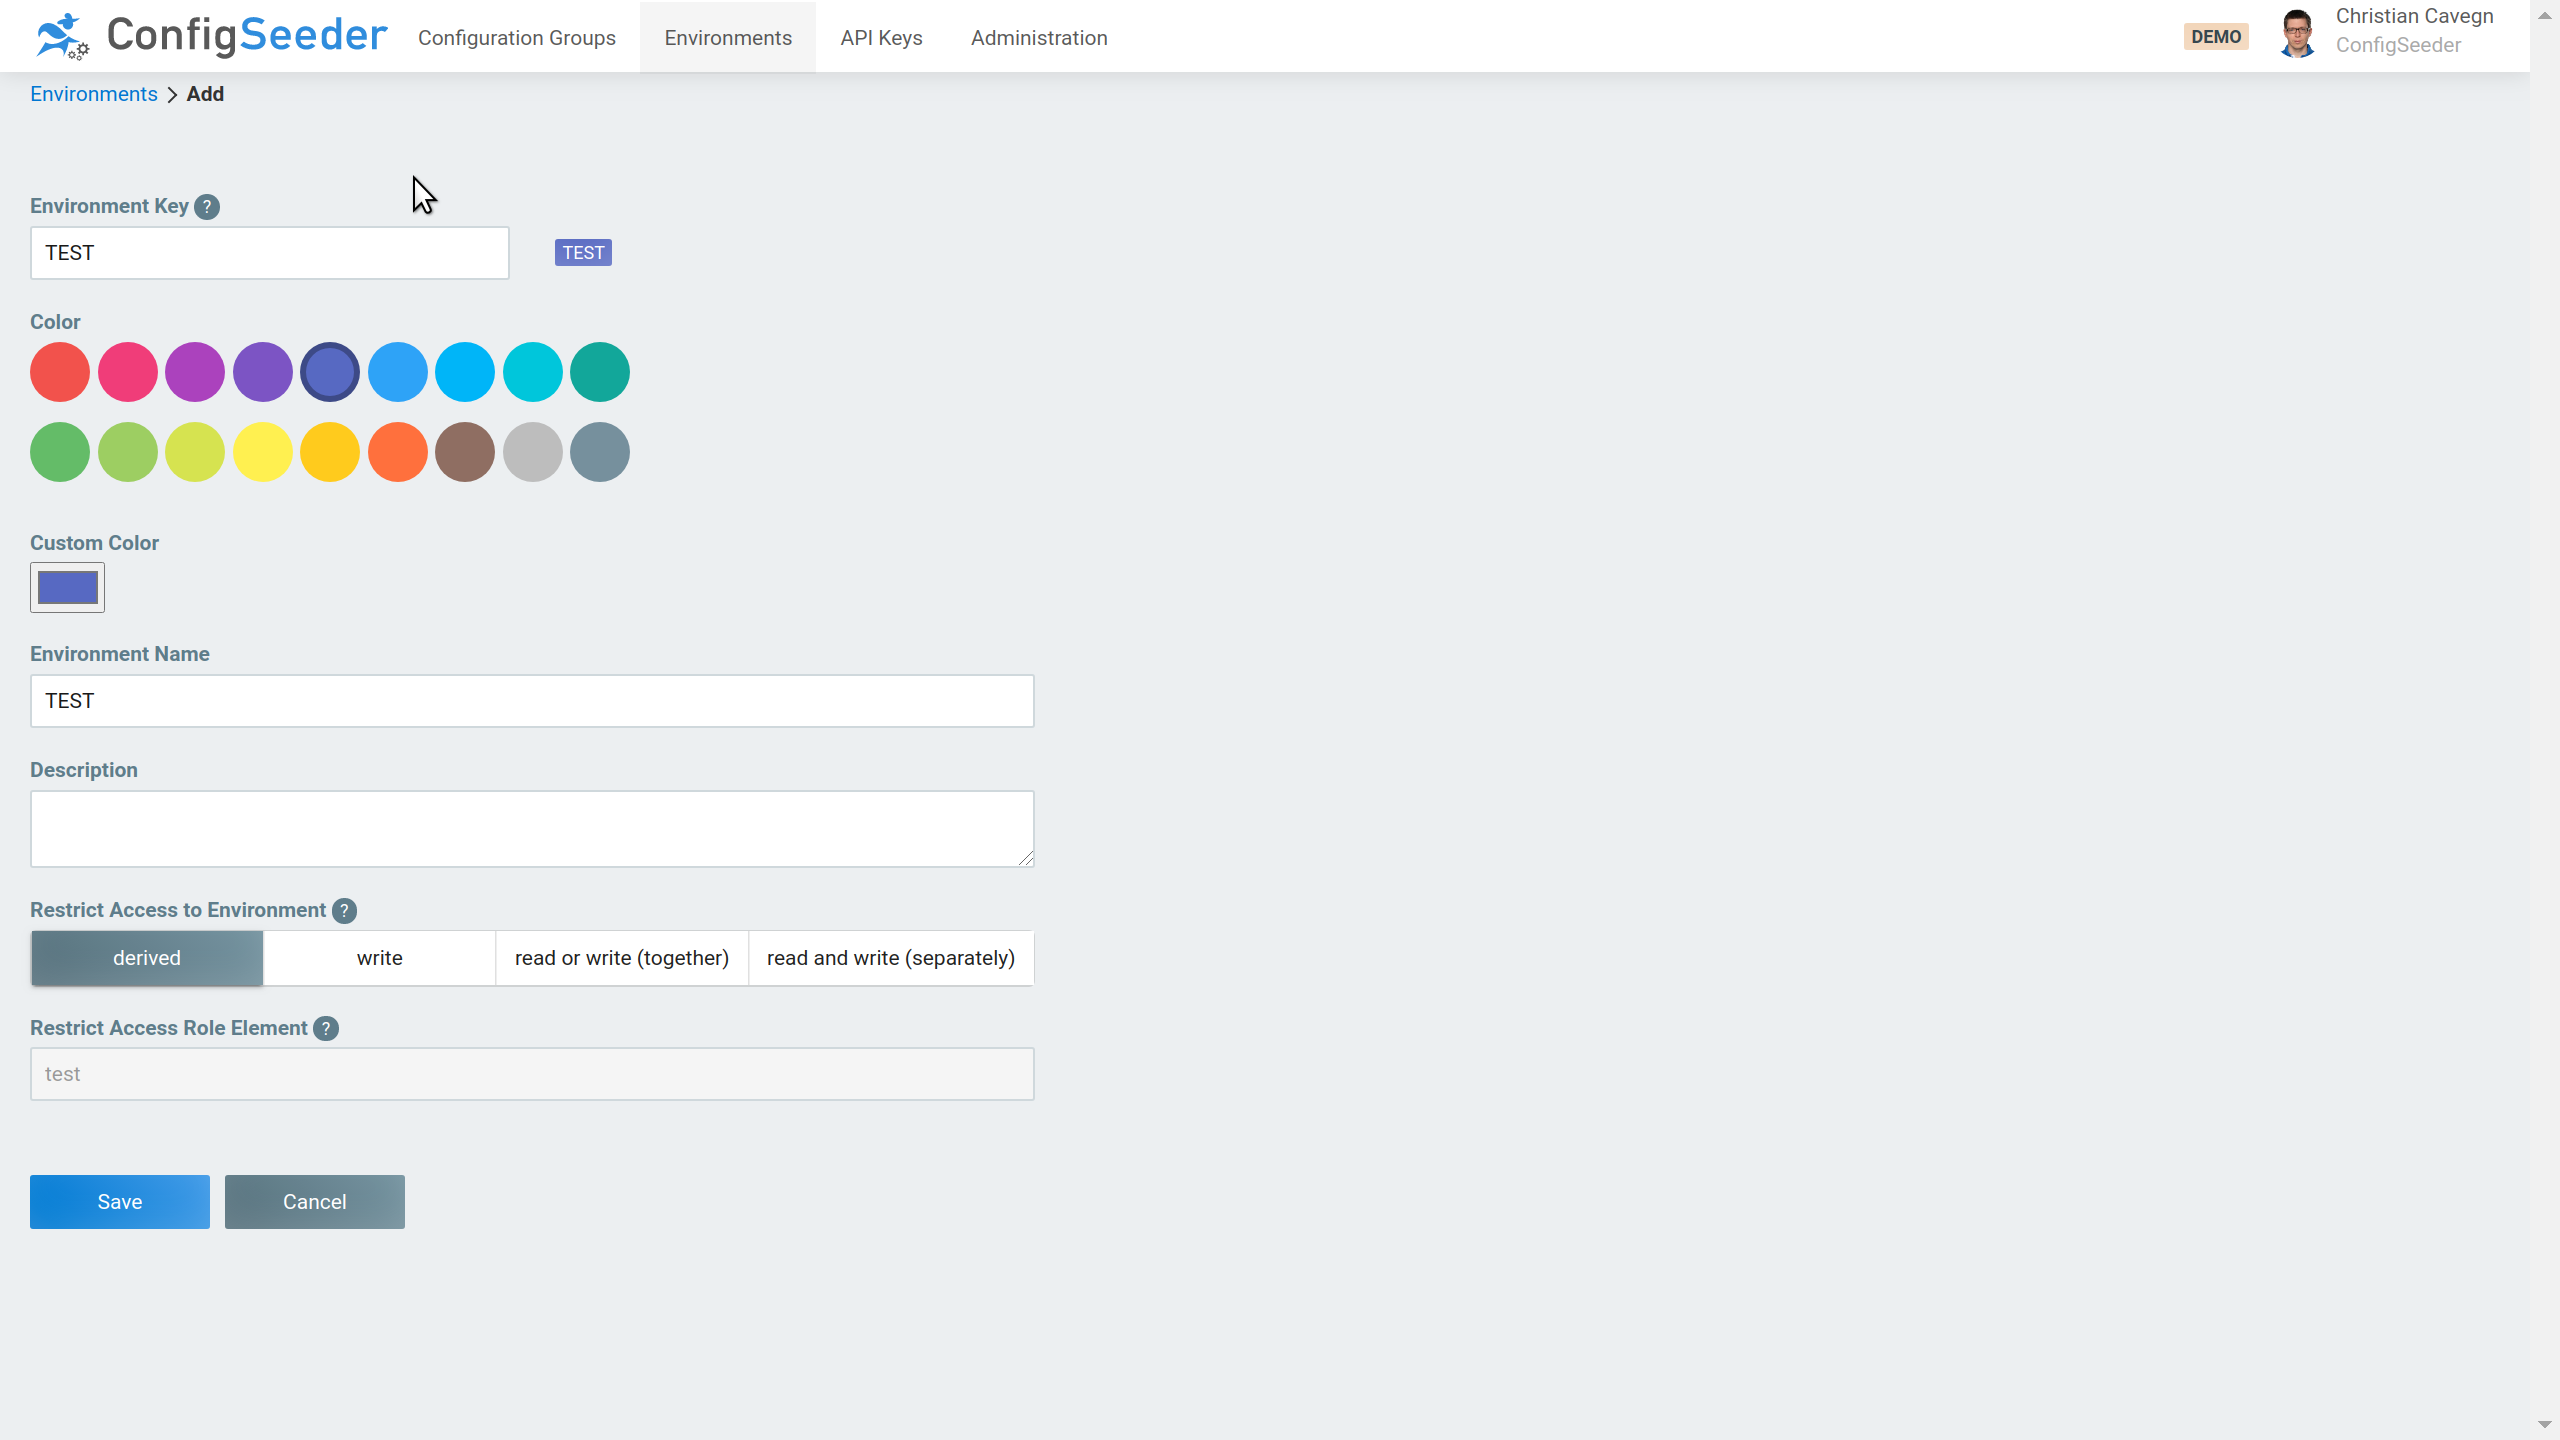
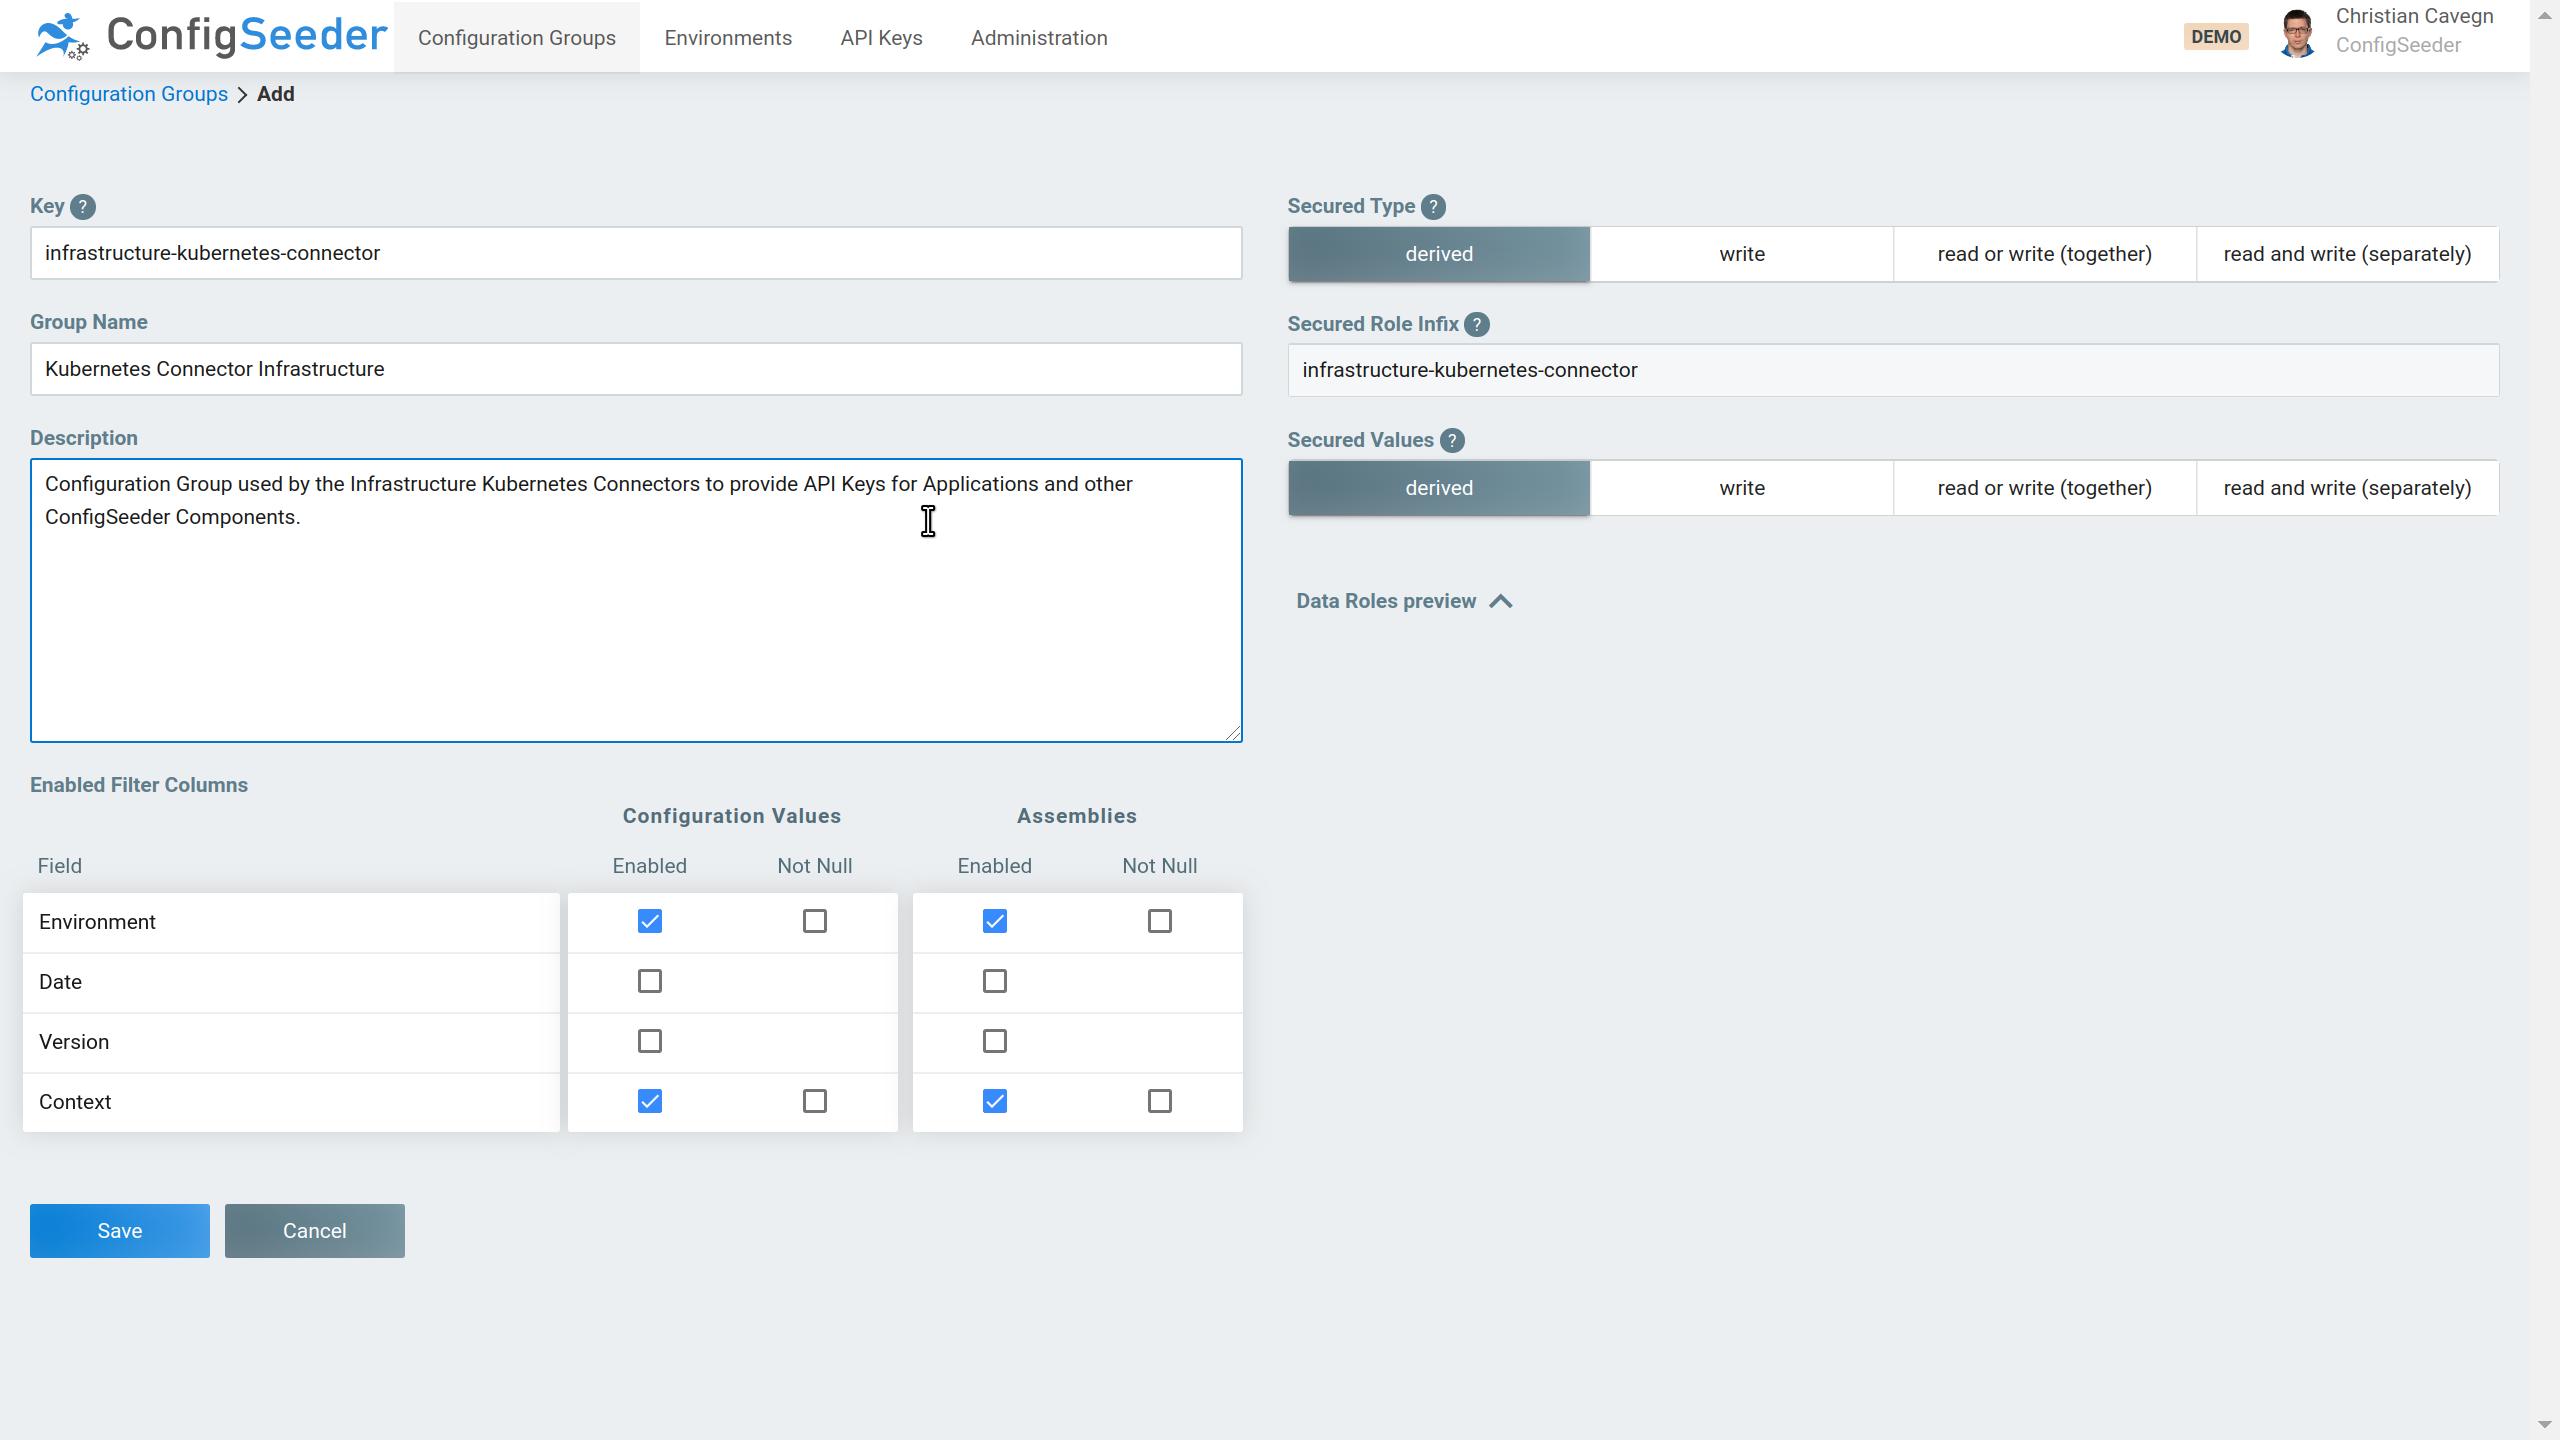
In this blog article, we only work with two environments. But of course, the same setup can be used with additional environments. - We recommend managing all API Keys in a dedicated Configuration Group. Therefore create the new Configuration Group ‘Kubernetes Connector Infrastructure’
- Create API Key
The Kubernetes Connector requires an API Key of the type Kubernetes Connector. Otherwise, it won’t be able to access the ConfigSeeder. So be sure to use the right type when you create the API Key.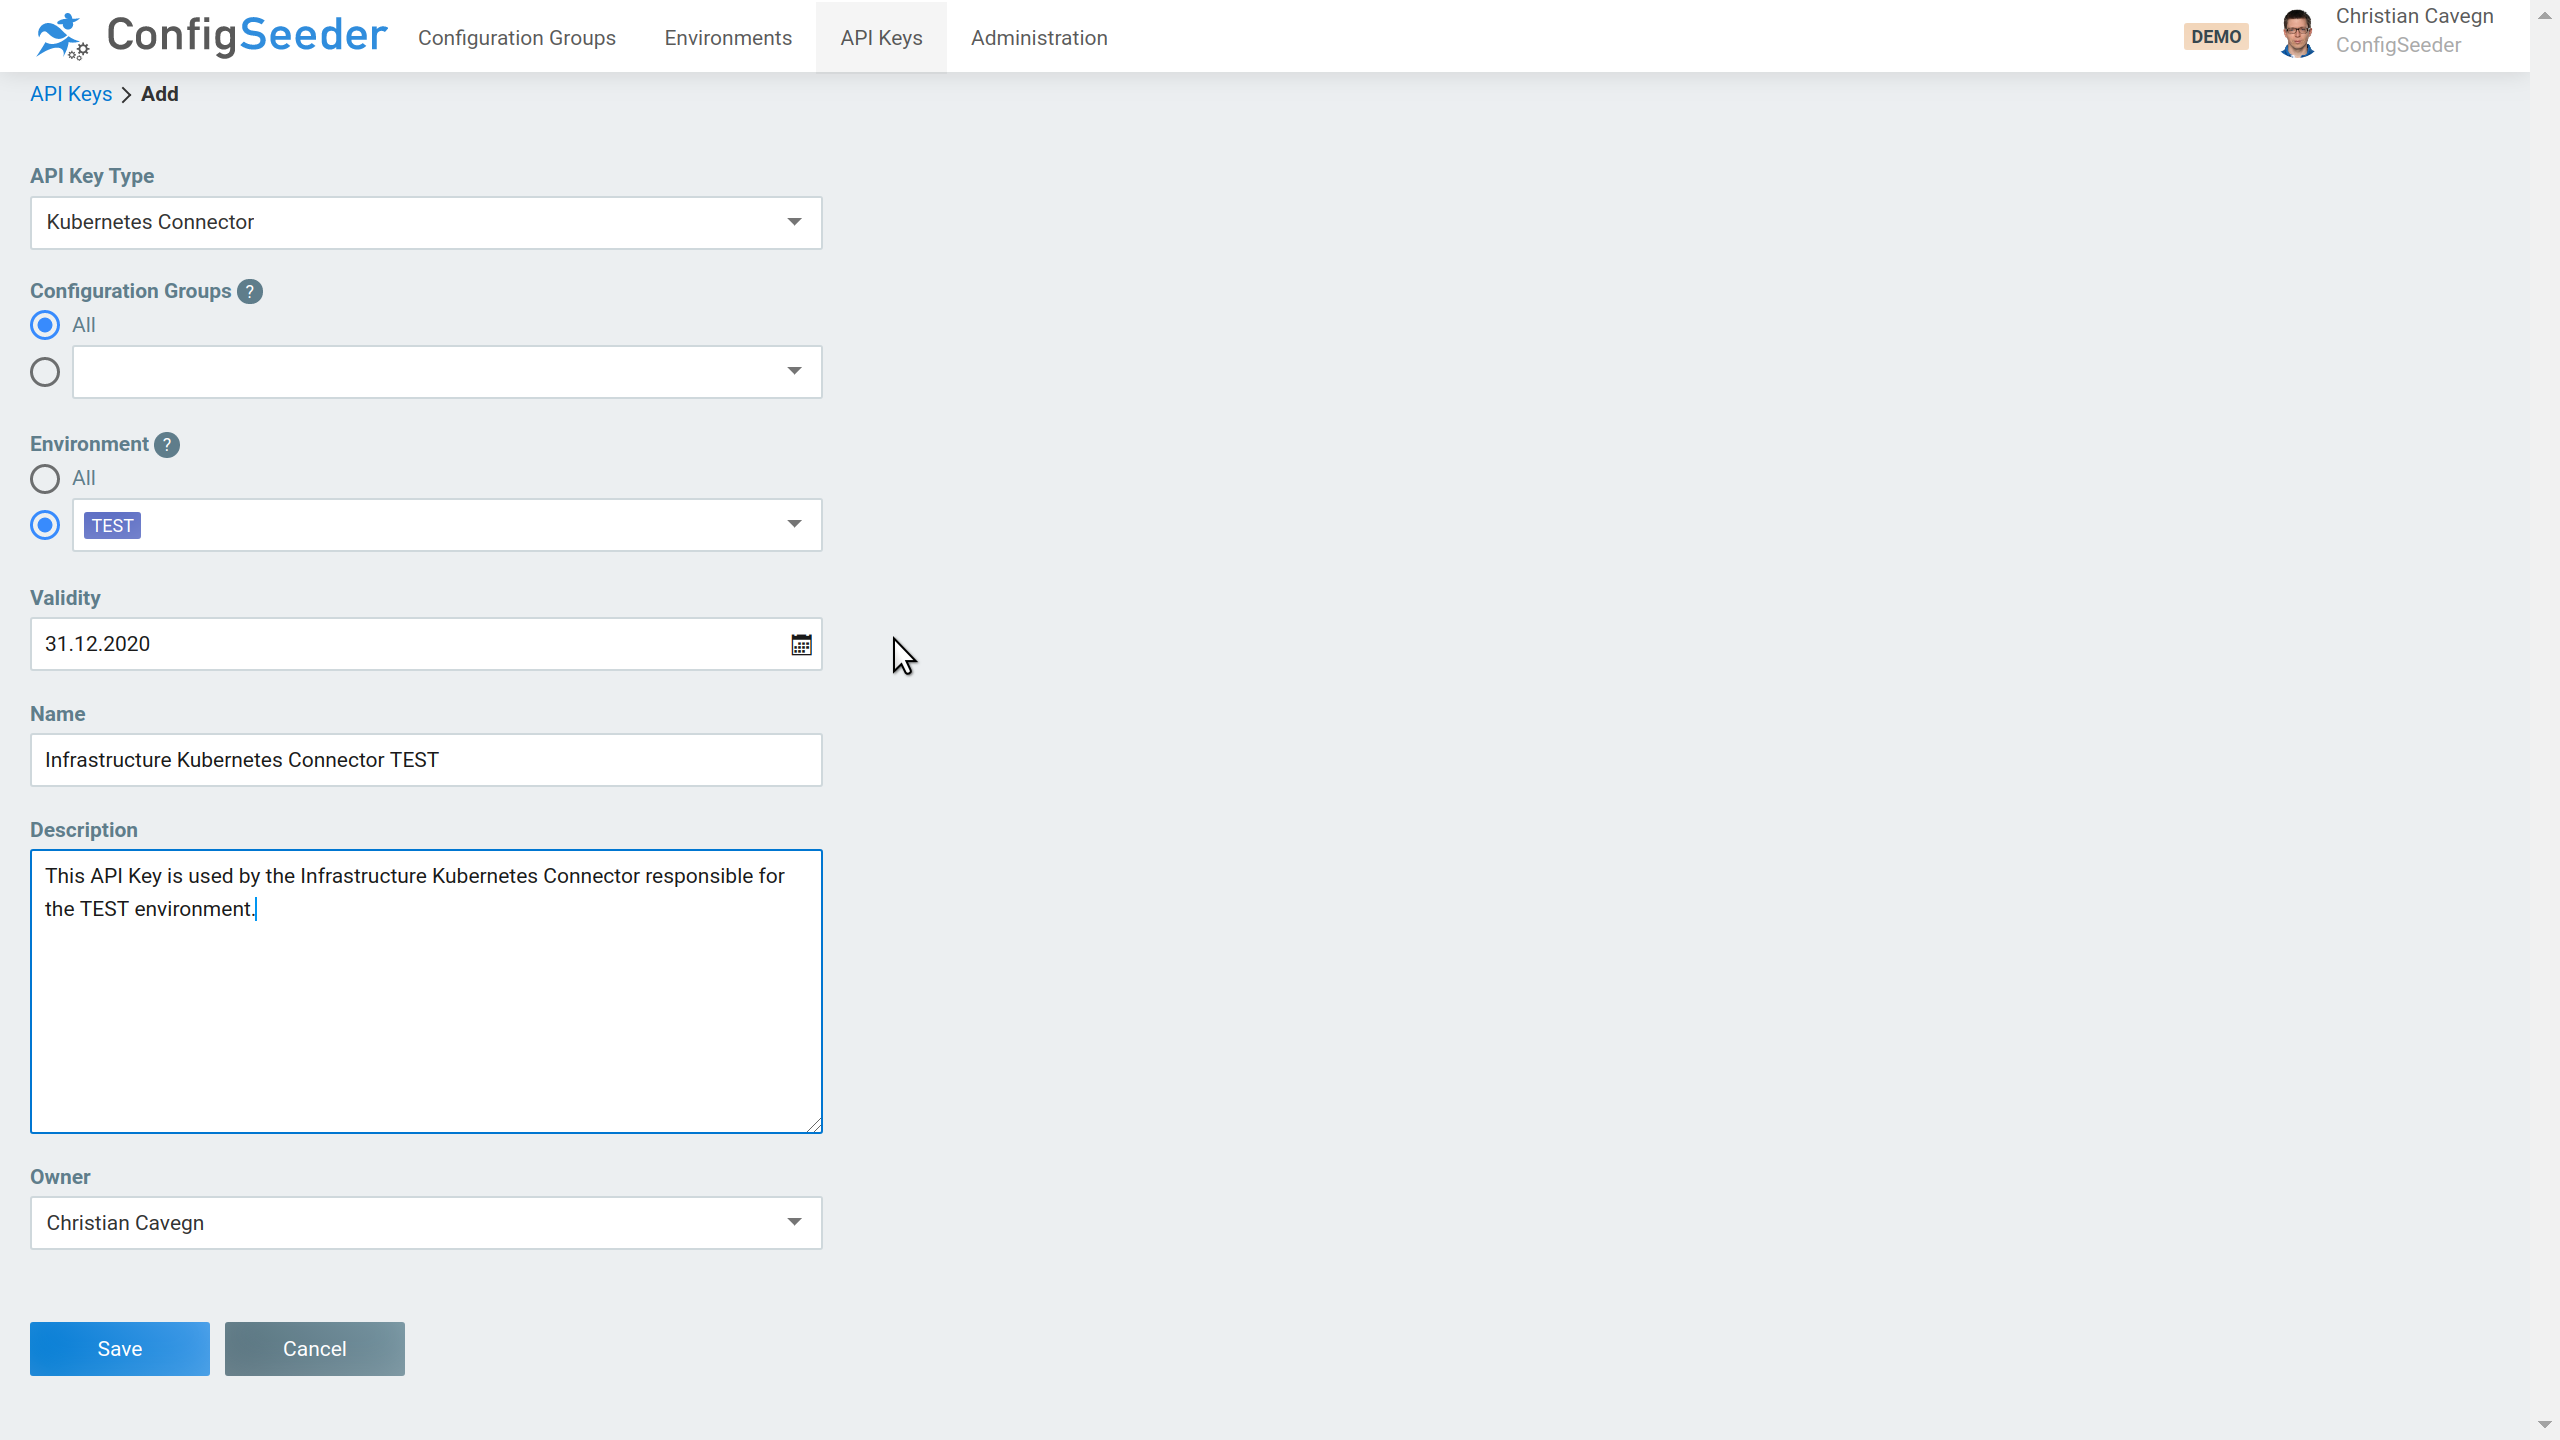
One Kubernetes Connector will be responsible for creating all the API Keys for the TEST environment and another one for all API Keys for the PROD environment. Kubernetes Connectors can only create API Keys for Configuration groups to which they have access themselves. Therefore you should create API Keys that grant access to all configuration groups but only one specific environment. So in the current scenario, we need one API Key for TEST and one for PROD.
With this Key, the Kubernetes Connector will then be able to create additional Keys that grant access only to specific configuration groups.
Prepare Kubernetes
Our Helm Charts can create most of the required Kubernetes Objects themselves. However, for security-relevant objects like ServiceAccounts, Roles, and RoleMappings you can choose, if they should be created by the Chart or if you like to create these objects yourself. In any case, you have to create a namespace and provide the Secrets containing the previously created API Keys.
You can do that with the following commands:
kubectl create ns kubernetes-connector-infrastructure
kubectl create secret generic -n kubernetes-connector-infrastructure apikey-test --from-file=apiKey=apiKey-test.txt
kubectl create secret generic -n kubernetes-connector-infrastructure apikey-prod --from-file=apiKey=apiKey-prod.txt
Install Kubernetes Connectors
In the next article of this series, we will provide the ConfigSeeder API Keys for the environments TEST and PROD. Therefore, one Infrastructure Kubernetes Provider for TEST and one for PROD is required. (Also see Using the Kubernetes Connector for the required number of Infrastructure Kubernetes Connectors)
Each of the Kubernetes Connectors will use its own API Key (which we stored in two secrets in the step before).
The Infrastructure Kubernetes Connectors run in one namespace. These Kubernetes Connectors will write their state into Status-ConfigMaps. It is important to set the name of this ConfigMap to an individual value per Connector. Otherwise, the connectors will override each other’s state.
Infrastructure Kubernetes Connector for TEST
Override values (infra-cronjob-test.yaml):
kubernetesConnector:
  apiKeySecretName: "apikey-test"
  cronJobName: "kubernetes-connector-test"

  configseeder:
    serverUrl: "https://demo.configseeder.com/"
    configurationGroupKeys: "infrastructure-kubernetes-connector"
    environmentKey: "TEST"

  configmap:
    disabled: "true"
  secret:
    disabled: "true"

  state:
    name: "kubernetes-connector-state-test"

serviceAccount:
  name: "kubernetes-connector-test"

rbacState:
  roleName: "kubernetes-connector-state-test"
  roleBindingName: "kubernetes-connector-state-test"

psp:
  create: true
  name: "kubernetes-connector-psp-test"
Be sure to set the Attribute serverUrl to your ConfigSeeder Instance
Install Kubernetes Connector:
helm upgrade -i -n kubernetes-connector-infrastructure -f infra-cronjob-test.yaml kubernetes-connector-cronjob-test configseeder-kubernetes-connector-cronjob-1.3.1+001.tar.gz
Infrastructure Kubernetes Connector for PROD
Override values (infra-cronjob-prod.yaml):
kubernetesConnector:
  apiKeySecretName: "apikey-prod"
  cronJobName: "kubernetes-connector-prod"

  configseeder:
    serverUrl: "https://demo.configseeder.com/"
    configurationGroupKeys: "infrastructure-kubernetes-connector"
    environmentKey: "PROD"

  configmap:
    disabled: "true"
  secret:
    disabled: "true"

  state:
    name: "kubernetes-connector-state-prod"

serviceAccount:
  name: "kubernetes-connector-prod"

rbacState:
  roleName: "kubernetes-connector-state-prod"
  roleBindingName: "kubernetes-connector-state-prod"

psp:
  create: true
  name: "kubernetes-connector-psp-prod"
Be sure to set the Attribute serverUrl to your ConfigSeeder Instance
Install Kubernetes Connector:
helm upgrade -i -n kubernetes-connector-infrastructure -f infra-cronjob-prod.yaml kubernetes-connector-cronjob-prod configseeder-kubernetes-connector-cronjob-1.3.1+001.tar.gz
View Results
Watch the namespace kubernetes-connector-infrastructure for Pods created by the CronJobs. Because the default cronjob-expression schedules the Kubernetes Connector every 5 minutes you probably have to wait some minutes before the first pod appears:
kubectl get pods -n kubernetes-connector-infrastructure -w
NAME                                         READY   STATUS              RESTARTS   AGE
kubernetes-connector-prod-1595164200-25t6m   0/1     Pending             0          0s
kubernetes-connector-prod-1595164200-25t6m   0/1     Pending             0          0s
kubernetes-connector-test-1595164200-kvpdb   0/1     Pending             0          0s
kubernetes-connector-test-1595164200-kvpdb   0/1     Pending             0          0s
kubernetes-connector-prod-1595164200-25t6m   0/1     ContainerCreating   0          0s
kubernetes-connector-test-1595164200-kvpdb   0/1     ContainerCreating   0          0s
kubernetes-connector-test-1595164200-kvpdb   1/1     Running             0          7s
kubernetes-connector-prod-1595164200-25t6m   1/1     Running             0          7s
kubernetes-connector-test-1595164200-kvpdb   0/1     Completed           0          8s
kubernetes-connector-prod-1595164200-25t6m   0/1     Completed           0          8s
Get the ConfigMaps containing the state of the Kubernetes Connectors:
kubectl get cm -n kubernetes-connector-infrastructure
NAME                              DATA   AGE
kubernetes-connector-state-prod   1      31s
kubernetes-connector-state-test   1      45h
Look into the state of the Infrastructure Kubernetes Connector responsible for the environment TEST:
kubectl get cm -n kubernetes-connector-infrastructure kubernetes-connector-state-test -o json | jq -r .data.state | jq
{
  "ModelVersion": "1",
  "ObjectState": null
}
There isn’t a Value Assembly of type API Key Secret defined in the Configuration Group ‘Kubernetes Connector Infrastructure’. Because of this, the Kubernetes Connectors didn’t create any API Key Secrets. This is also the reason why the ObjectState of the Kubernetes Connector is empty.
Conclusion
In short, we showed in this article, how the Kubernetes Connector can be run as a CronJob installed by Helm. As a first step, we prepared a setup with the two environments TEST and PROD and installed one Kubernetes Connector for handling each of the environments.
In the next article, we will show you these Infrastructure Kubernetes Connectors in action. We will add an API Key Secret and see what happens in the Kubernetes Cluster.